Raspberry Pi Home Automation: Simplifying Home Setup
*We may earn a commission for purchases made using our links. Please see our disclosure to learn more.
Raspberry Pi Home Automation: Simplifying Your Smart Home Setup
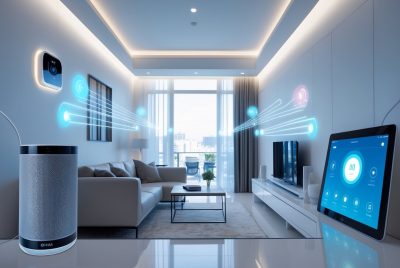
Home automation represents a significant shift in how we interact with our domestic environments, allowing for enhanced convenience and smart management of home devices. As someone with an interest in DIY solutions and technology, I’ve found that the Raspberry Pi, a small yet powerful single-board computer, is a perfect tool to centralize and manage a variety of home automation tasks. Combining affordability with versatility, the Raspberry Pi serves as an accessible platform for beginners and experienced enthusiasts alike to automate their homes and tailor smart functions to their specific needs.

Utilizing a Raspberry Pi for home automation offers a custom approach, enabling control over lighting, temperature, security systems, and various household appliances. I appreciate that its open-source nature allows for extensive customization and integration of a wide range of devices from multiple brands. This freedom to tinker has enabled me to explore and implement a variety of reliable and creative automation solutions without the substantial cost typically associated with commercial smart home systems.
My experience with setting up a Raspberry Pi as a home automation hub has taught me that not only is it a cost-effective choice, but it also enhances daily life by simplifying routine tasks. The convenience of scheduling appliances, voice controlling lights, and monitoring my home remotely offers peace of mind and efficiency. The Raspberry Pi’s broad compatibility with various peripherals and software means I can keep expanding and refining my system to match my evolving lifestyle preferences.
Getting Started with Raspberry Pi for Home Automation

Embarking on home automation with a Raspberry Pi involves a series of steps that I’ll guide you through. From selecting the appropriate Raspberry Pi model to securing your setup, this section will provide clear instructions to ensure a smooth start to your home automation project.
Selecting the Right Raspberry Pi Model
For home automation, I recommend using the Raspberry Pi 4 due to its powerful processor and multiple RAM options, which can handle the demands of most home automation tasks. When choosing the model, consider the complexity of your project as it influences the RAM requirement, with options typically ranging from 2GB to 8GB.
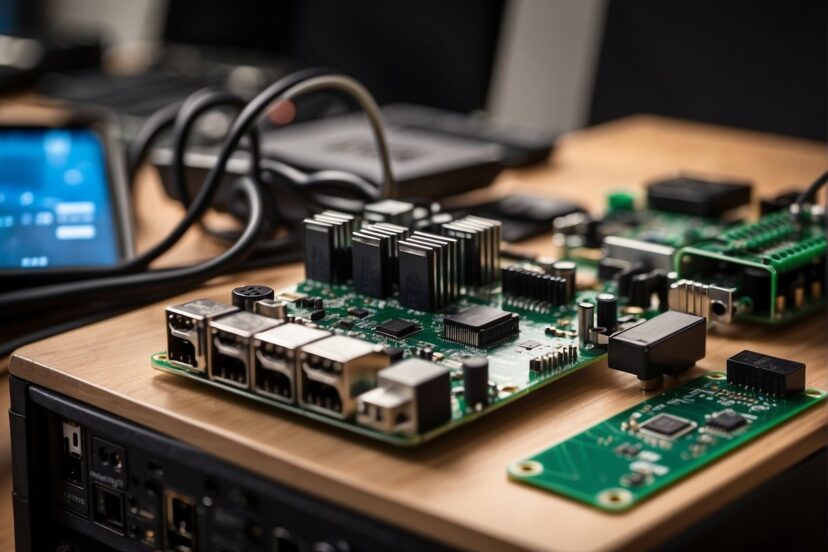
Essential Hardware Components
To use Raspberry Pi for home automation, you will need the following hardware components:
- Raspberry Pi board
- MicroSD card: At least 16GB to store your operating system and programs.
- Power supply: Preferably 2.5A or more to provide sufficient power.
- Ethernet cable or Wi-Fi connection: For network access (though Pi 4 has built-in Ethernet and Wi-Fi).
- Additional sensors: Depending on the specific tasks you want to automate.
Installing the Operating System
The standard operating system for Raspberry Pi is Raspbian. I use the Raspberry Pi Imager to flash the operating system image onto the MicroSD card. It’s a user-friendly software that simplifies the installation process.
Initial Raspberry Pi Configuration
Once the operating system is installed, I perform the initial setup by enabling interfaces like Wi-Fi, Bluetooth, and SSH (for remote access) through the raspi-config tool. This utility allows me to configure various settings to match my requirements.
Connecting to a Network
For my Raspberry Pi to communicate with other devices, it must be connected to a network. I either connect an Ethernet cable for a wired connection or configure the Wi-Fi for wireless access. A stable network connection is critical for reliable home automation.
Securing Your Raspberry Pi
Security is paramount. I change the default password and keep the system up to date with the latest patches. Additionally, I can install a firewall and limit access to the Pi to specific devices or IP addresses to enhance the security of my home automation system.
Integrating Raspberry Pi with Home Automation Software

In this section, I’ll guide you through selecting and setting up the right home automation software on your Raspberry Pi, and how to integrate various smart devices to create a seamless smart home experience.
Choosing Automation Software
When I decide on automation software for a Raspberry Pi smart home setup, the compatibility and feature set are key. Popular choices like Home Assistant, openHAB, and Domoticz are compatible with Raspberry Pi and offer extensive support for various smart home devices and protocols. I consider the user interface, ease of use, and community support when choosing the right software for my needs.
Installation and Setup of Automation Software
Once I’ve selected the software, the installation process usually involves downloading the software image and writing it to a microSD card using a program like balenaEtcher. After booting the Raspberry Pi with this card, I follow the software’s specific installation and setup instructions. For Home Assistant, for example, I navigate to the Raspberry Pi’s IP address in a web browser to access the user interface and start configuration.
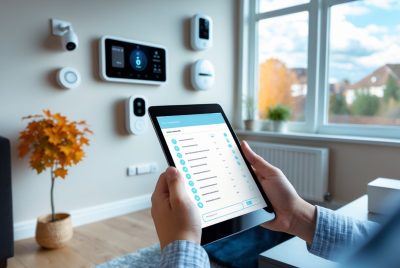
Integrating Smart Devices
Integrating smart devices into the Raspberry Pi automation system requires ensuring all devices are on the same network and compatible with my chosen software. I often use the built-in integrations or add-ons provided by the software to connect devices like smart bulbs, thermostats, and sensors. The process typically involves the discovery of devices on the network or manual addition through the web interface.
Configuring Automation and Triggers
After integrating smart devices, I create automations and triggers to automate tasks based on conditions. For instance, I can set up a motion sensor to trigger smart lights to turn on when movement is detected. I use the software’s interface to configure these automations, specifying the trigger (e.g., motion detected), the condition (e.g., during nighttime), and the action (e.g., turn on lights). These automations can greatly enhance the convenience and efficiency of my smart home.
Developing Home Automation Projects

When I create home automation projects, my focus is on enhancing convenience, increasing energy efficiency, and bolstering home security through intelligent automation and control.
Automating Lighting and Energy
My Approach:
- Lighting: I use Raspberry Pi to automate indoor and outdoor lighting. I schedule lights to turn on at sunset and off at bedtime, leveraging natural light cycles and saving energy.
- Energy Efficiency: I monitor and manage energy use by connecting smart plugs with Raspberry Pi, which allows me to automate appliances and reduce unnecessary power consumption.
Security and Presence Detection
My Strategy:
- Security System: I integrate motion sensors and cameras with my Raspberry Pi to develop a DIY security system, capable of sending notifications to my devices upon detecting any unusual activity.
- Presence Detection: By utilizing RFID or Bluetooth Low Energy (BLE) tags, I can detect who is coming and going, which then enables my system to automate tasks like opening the garage door as I approach.
Environmental Monitoring and Control
My Implementation:
- Monitor: I set up sensors for temperature, humidity, and air quality, all linked to a Raspberry Pi, to continuously monitor home environmental conditions.
- Control: Based on the data from these sensors, I automate HVAC systems to maintain optimal atmosphere, contributing to a comfortable and energy-efficient home environment.
Creating Smart Home Scenes
My Process:
- Smart Home: By programming Raspberry Pi, I create smart home ‘scenes’ which control a series of devices with a single command. A ‘movie night’ scene, for instance, dims the lights, lowers blinds, and turns on the TV.
- Automation: I can also automate these scenes based on time or triggers from other devices. For example, the ‘good morning’ scene gradually increases lighting and adjusts the thermostat to a comfortable temperature.
By carefully planning and implementing these systems, I ensure that I can run my home with greater efficiency, comfort, and security.
Programming and Advanced Customizations

In my custom home automation projects, programming and advanced customizations offer the flexibility and control needed for truly smart functionality. Leveraging open-source platforms and scripting languages, I create seamless and sophisticated systems.
Leveraging Python for Automation
Python is a versatile language that I frequently employ due to its readability and broad support within the home automation community. For Raspberry Pi-driven systems, Python scripts can be written to interact with hardware components or process data. Here are some Python features I use:
- Automation Scripts: Python’s clear syntax allows me to write robust scripts that control various devices like smart lights or sensors with simple commands.
- Open-Source Libraries: There is a rich ecosystem of Python libraries that are perfect for integration with hardware. Libraries such as RPi.GPIO and Adafruit_Blinka give me direct control over GPIO pins.
Utilizing APIs and MQTT Protocol
APIs play a crucial role in home automation by providing a method to issue commands and exchange data between different services and devices. Here’s how I integrate APIs:
- Device Interactions: I use APIs to send commands to devices or retrieve their status, making sure that my automation system can react to changes in real-time.
- MQTT for Communication: The MQTT protocol is a lightweight messaging system that’s ideal for IoT. It allows devices to publish and subscribe to topics, enabling them to communicate as needed.
Below is an example of MQTT topics structure:
| Topic | Purpose |
|---|---|
home/livingroom/temperature |
Publishes living room temperature |
home/bedroom/light |
Controls the bedroom light |
Exploring Node-RED for Visual Programming
Node-RED is a powerful tool I use for visual programming. It is a browser-based editor that makes it easier to wire together APIs, hardware devices, and online services by following a flow-based approach. Some key advantages include:
- Drag-and-Drop Interface: This allows me to connect nodes that represent devices, functions, or APIs easily, creating complex logic with minimal coding.
- Customizable Flows: With Node-RED, customizing workflows to the unique needs of my home automation system is straightforward, thanks to its user-friendly interface.
By applying Python, harnessing APIs, and utilizing MQTT and Node-RED, I build advanced and highly customizable home automation systems that are both functional and adaptable to future enhancements.
Community and Resources

I understand the importance of community engagement and resource availability when it comes to home automation with Raspberry Pi. It’s not just about having the hardware; it’s also about the wealth of information and support that can transform a project from concept to reality. Here I will focus on how to leverage community projects for learning, the best ways to find and use add-ons, and where to seek troubleshooting and support to ensure your smart home system operates smoothly.
Learning from Community Projects
My first step often involves diving into existing community projects. I can learn a great deal from what others have done, especially because many Raspberry Pi enthusiasts have shared their home automation journeys online. Open-source projects are especially valuable—these include Home Assistant and Mycroft, and many complete guides available that detail the process of setting up smart home systems using Raspberry Pi.
- Open-source platforms: Home Assistant, Mycroft
- Guides: Step-by-step tutorials on specific home automation tasks
Finding and Using Add-ons
Add-ons expand the capabilities of my home automation system. These are often community-contributed and are compatible with open-source platforms like Node-RED and Mosquitto. To find and use add-ons effectively, I look out for:
- Community repositories (Example: Home Assistant’s Add-on Store)
- Compatibility with my Raspberry Pi version
- Reviews and ratings by other users
| Add-on Type | Use Case |
|---|---|
| Smart lights | Philips Hue, LIFX integration |
| Smart locks | August, Yale control |
| Virtual Assistant | Voice control and smart assistance |
Troubleshooting and Support
When I hit a snag, community support is crucial. Fortunately, Raspberry Pi has a robust support system, from forums to dedicated troubleshooting guides. Here’s how I approach getting help:
- Official Raspberry Pi forums: A place to ask questions and share experiences.
- Platform-specific help: e.g., Home Assistant’s community documentation.
- Local user groups: Sometimes, the best support is right around the corner.
Pro Tip: Always update my system regularly to minimize issues (sudo apt-get update, followed by sudo apt-get upgrade -y).
Choosing Accessories and Add-Ons
When I set up my own Raspberry Pi for home automation, selecting the right accessories and add-ons was crucial for ensuring compatibility and maximizing functionality. Here’s my approach to choosing the best components.
Selecting Additional Hardware
When it comes to additional hardware, I look for devices that complement the Raspberry Pi’s capabilities and meet the specific needs of my home automation project. For me, a must-have is a reliable power supply with sufficient amperage to ensure stable operation. I also consider the RAM requirements; more complex automation tasks may need a Raspberry Pi model with higher RAM.
My Hardware Checklist:
- Power supply (5V/2.5A for Pi 3, 3A for Pi 4)
- Raspberry Pi with adequate RAM (2GB for basic, 4GB+ for advanced automation)
- MicroSD card (Class 10, 16GB+ recommended)
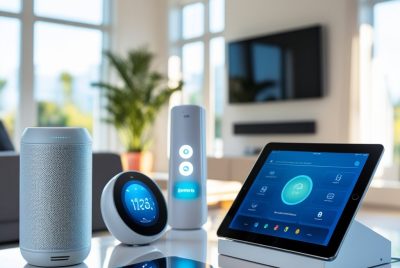
Smart Home Integration Devices
I integrate smart home devices using either inbuilt protocols or external hubs. Zigbee and Z-Wave are popular choices, but not natively supported by all Raspberry Pi models, so a compatible smart hub, such as Philips Hue for lighting, is often required. I ensure that the devices I choose can seamlessly integrate with the central home automation software on my Raspberry Pi for efficient control and monitoring.
Integration Essentials:
- Zigbee or Z-Wave USB stick for direct integration
- Smart hubs (e.g., Philips Hue Bridge for Philips Hue devices)
- Compatible smart home devices (sensors, lights, switches)
Enhancing Functionality with Add-Ons
Add-ons can significantly enhance the functionality of a Raspberry Pi in terms of control and automation. One of my key additions is a high-quality camera module, which is essential for security features. For broader control, I recommend touchscreen displays and compatible sensors that can monitor various environmental factors. These add-ons should align with the software’s capabilities and the intended scope of automation.
Functional Add-Ons:
- Camera module for security (ensure compatibility with motion detection software)
- Touchscreen display for direct control
- Environmental sensors (temperature, motion, humidity)
By carefully selecting the right hardware, integration devices, and functional add-ons, I’m able to build a robust and efficient home automation system around the Raspberry Pi.
Frequently Asked Questions
In this section, I’ll address some common inquiries you may have when considering setting up a Raspberry Pi as a home automation server.
1. What are the requirements for setting up a Raspberry Pi as a home automation server?
To set up a Raspberry Pi for home automation, you need a Raspberry Pi board (ideally Model 3B or newer), a microSD card with the recommended operating system (such as Raspbian), a stable power supply, and a network connection. Additionally, you should have compatible home automation software, like Home Assistant or Domoticz, and the necessary smart devices you wish to automate.
2. How can I build a home automation system using a Raspberry Pi 4?
Begin by installing a home automation platform, such as Home Assistant, on your Raspberry Pi 4. Then, integrate your smart home devices, which may include lights, locks, and sensors, by following the platform’s documentation. Customize automation rules to suit your preferences through the user interface or configuration files.
3. What are some common applications of Raspberry Pi in home automation?
The Raspberry Pi can control various smart devices in your home, from smart lights like Philips Hue and LIFX to smart locks from brands like August and Yale. It can also manage thermostats, security cameras, and even integrate with voice assistants for voice-controlled automation.
4. Which Raspberry Pi model is most suitable for running Home Assistant?
While Home Assistant can run on various models, the Raspberry Pi 4 is a popular choice due to its improved performance and enhanced connectivity options, which provide a more seamless and responsive home automation experience.
5. How does using a Raspberry Pi for home automation compare to Arduino-based solutions?
Raspberry Pi offers a full-fledged operating system, which allows for more complex processing and networking capabilities than Arduino. This makes the Raspberry Pi more suitable for comprehensive home automation systems requiring advanced control logic, interfacing with a wide array of devices, and network connectivity.